How Do I Use Gutenberg Post Blocks?
Gutenberg comes in a library of pre-built elements or blocks to make the website content more visually appealing than before. All of these elements or blocks can be added to customize a website’s posts and pages.
One of the most powerful features of Gutenberg is that you can add other plugins to add all kinds of new blocks that Gutenberg lacks. And this is where the Gutenberg post blocks plugin comes in, with an additional innovative collection of beautiful blocks to expand Gutenberg’s editing capabilities.
With this plugin, you can add post layout and additional filters to your posts and display them in an elegant way on your wordpress site. So, if you are interested in using this plugin, keep on reading this guide. Today, we will show you how do I use Gutenberg post blocks in detail.
Gutenberg Post Blocks
Before diving into the main point, let’s get some ideas about the Gutenberg Post Blocks plugin. This plugin is specially designed to showcase your website’s posts in a professional as well as eye-catching way.
With all its amazing customization options and features, you can create something exceptional without even putting much effort. It can be used to create fully customized personal blogs, travel blogs, food reviews, news, review articles, recipes, magazines, and many more.
We all know how essential it is to ensure optimum user experience to grow a website. And this responsive, powerful, and one of the best Gutenberg post block plugin for wordpress can be your perfect companion to make your website posts well optimized and eye-catching. This way, the users of your site will find it easy to navigate and stay engaged.
How Do I Use Gutenberg Post Blocks?
To use this plugin, you won’t have to go through any hassle, as it is one of the most easy-to-use and beginner-friendly plugins. In fact, no coding skills are required to use it.
You just need to follow the following simple steps, and you will come up with a beautiful and elegant post block to display on your website. So, let’s get started with how do I use Gutenberg post blocks-
In this guide, we are going to use the Gutenberg post blocks plugin by WPQode.
Step 1: Install the Gutenberg Post Blocks Plugin
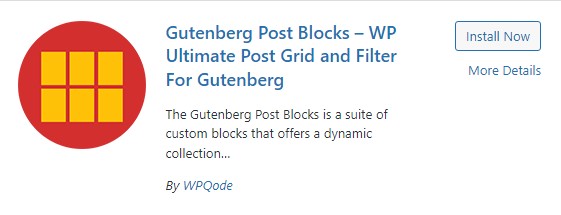
So, as usual, in the first step, you need to install the plugin. And to do this-
- Login to your WordPress site, and from the dashboard, select Plugins.
- From the dropdown menu, choose Add New.
- Now, go straight to the right-side search box, type “Post Block WPQode,” and hit the Enter button.
- Once you get the plugin, click on “install now,” and after the installation hit the Activate
Now, your post block plugin is activated, and you can start working on it.
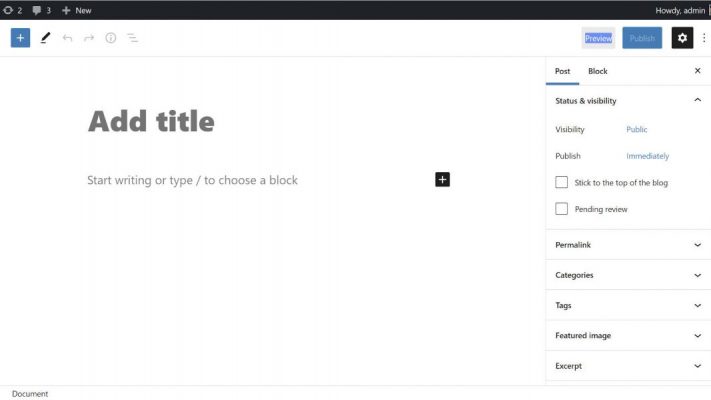
Step 2: Access The Post Blocks Plugin In Gutenberg
Before you move to use this plugin, make sure that you are on block editor mode. Once confirmed, follow the below steps to access this plugin.
- Open a new page inside the Gutenberg.
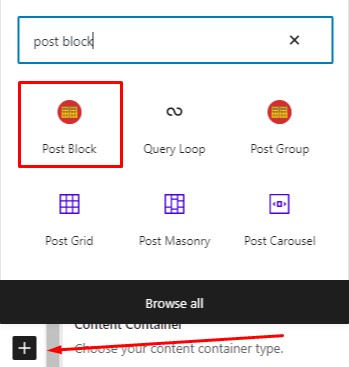
- Click on the (+) icon, and you will immediately see all the Gutenberg blocks. As we are looking to access the Post block, it will be better if you type “Post Block” into the search box to get the block quickly.
- Once you get the post block option, just click on it.
And from here, you can start customizing your posts using the Block section of this plugin from the right sidebar.
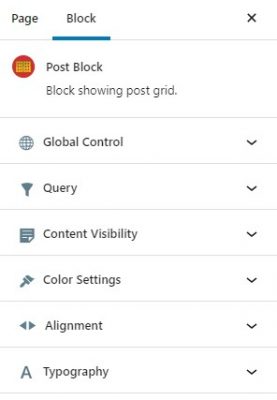
The block section will look like the above image, where you will get to customize everything from global settings to queries, content visibility, color settings, alignment, and typography in your own way.
Step 3: Customizing The Global Control
This plugin consists of a number of post layouts to display your posts; for example-
- Grid layout,
- List layout, and
- Overlay layout.
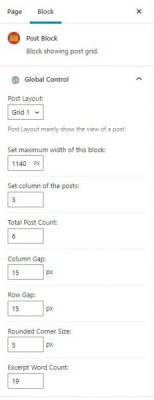
So, you should start by choosing the preferred layout for your website posts. Once done, you can start setting the block width, the total column of the posts, and the number of posts you need to display.
In fact, it includes the choice for column and row gaps as well as an option to set the rounded corner side. Best of all, you have the option to specify the excerpt word count to display on your block.
Remember one thing, when you make all the adjustments; you can see the changes live accordingly. So, it will help you to fine-tune your design and get the best version of your creativity.
Step 4: Set Up The Query Settings
Next up is the advanced query feature, which allows you to display your website posts by category as well as order them by post queries, such as most popular posts or random posts.
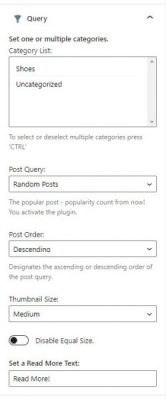
You can also designate your website post order by ascending or descending order, specify the thumbnail size, and also disable equal size. Finally, if you need to show more posts, then you can set the Read More Text or any other text you like.
Step 5: Configure The Content Visibility
The content visibility function enables you to make minor to major adjustments to the elements of the post blocks.
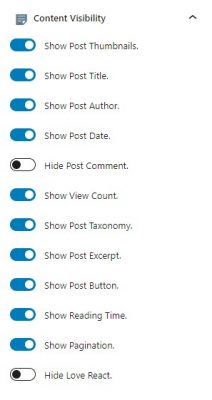
Here you will find a boatload of options to determine what to include or exclude from your post block layout. For example, you will get the options to enable or disable your post thumbnail, title, author name, date, taxonomy, post comment, excerpt, button, reading time, and many more.
Step 6: Color Settings
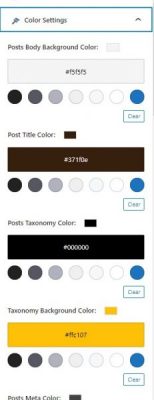
This plugin lets you customize the color of your posts’ body background, title, taxonomy, taxonomy background, meta, meta icon, descriptions, buttons, and all other elements on your layout just the way you want. You will get unlimited color options to style your post block and match your theme.
Step 7: Pagination Alignment
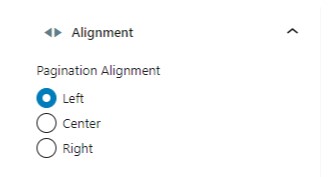
Then, we have the pagination alignment option to adjust the pagination. You can place it on the left, right, and center of your page based on which direction you want it to appear.
Step 8: Typography
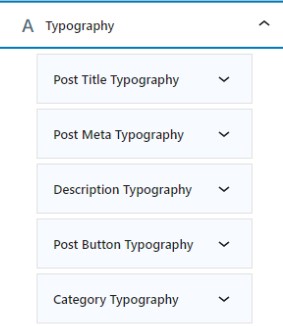
From here you can customize your post’s title, meta, description, button, and category typography. The degree of details in all this typography styling is almost insane. For example, when you click the downside arrow of the post title typography, you will get the following options to customize.
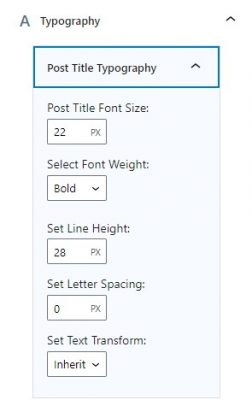
From the font size to font weight, line height, letter spacing, and text transformation, you can style everything as you want for your post’s title and meta.
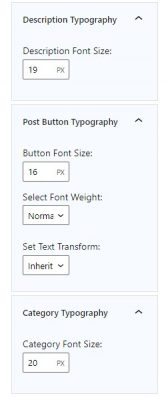
Similarly, you can also specify the description font size, post button size, weight, text transformation, and finally category font size of your post block.
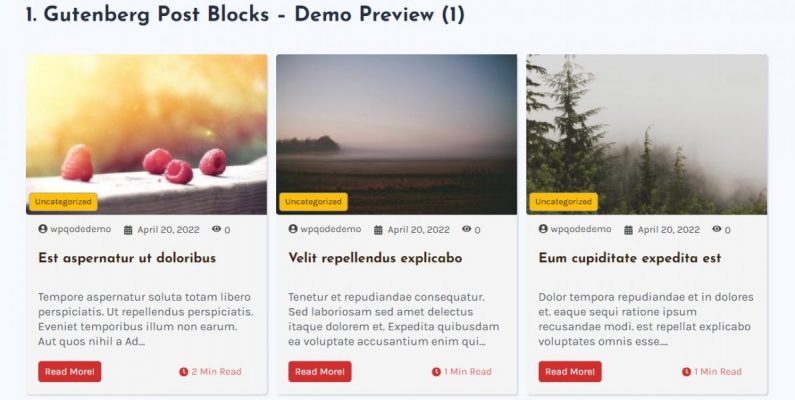
Now, let’s get a preview of how it works. Here is one of the post grid blocks in action-
Here’s what the list layout looks like-

And finally, this is how the overlay layout will display your website posts-

Step 9: Customizing The Post Group
This is by far the most interesting feature in this post block plugin. This post group block allows you to display your posts in a group. This means you can keep all similar category posts in specific groups using this plugin.
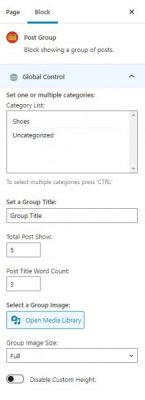
You can set the groups in one or multiple categories and then give the group a title, including a group image. With the other optimization option, you can specify the total posts you need to show in a group, title word count, and finally specify the image size of the specific group.
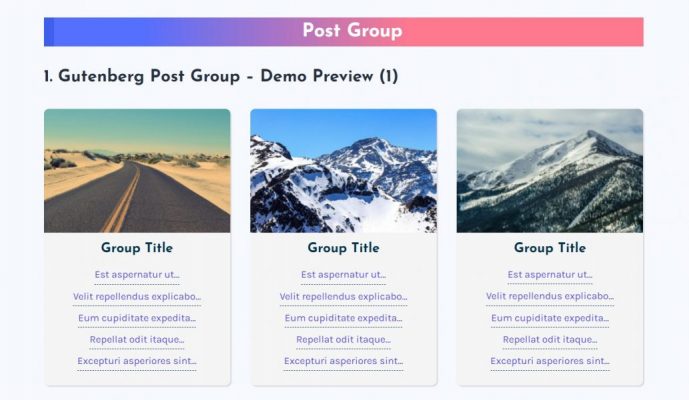
So, this is what the post group seems like-
Step 10: Publish The Post
Finally, when all the optimization is done and you get what you are looking to create, simply publish the post. Now, you will see an entirely new set of post blocks added to your site.
Wrapping Up
Gutenberg already works really simple and effectively to create content, and when you add a plugin like post blocks with Gutenberg, it becomes much more efficient. If you are looking to make your website posts well-organized and display them unique from others, consider using this Gutenberg post blocks plugin.
So, this is all for how do I use Gutenberg post blocks. We hope that now you are ready to make beautiful post blocks on your site and give your users a wonderful and user-friendly experience on your site.